SIK 1 - Blink

First, if you haven't already, create an account on codebender using your BVSD email.
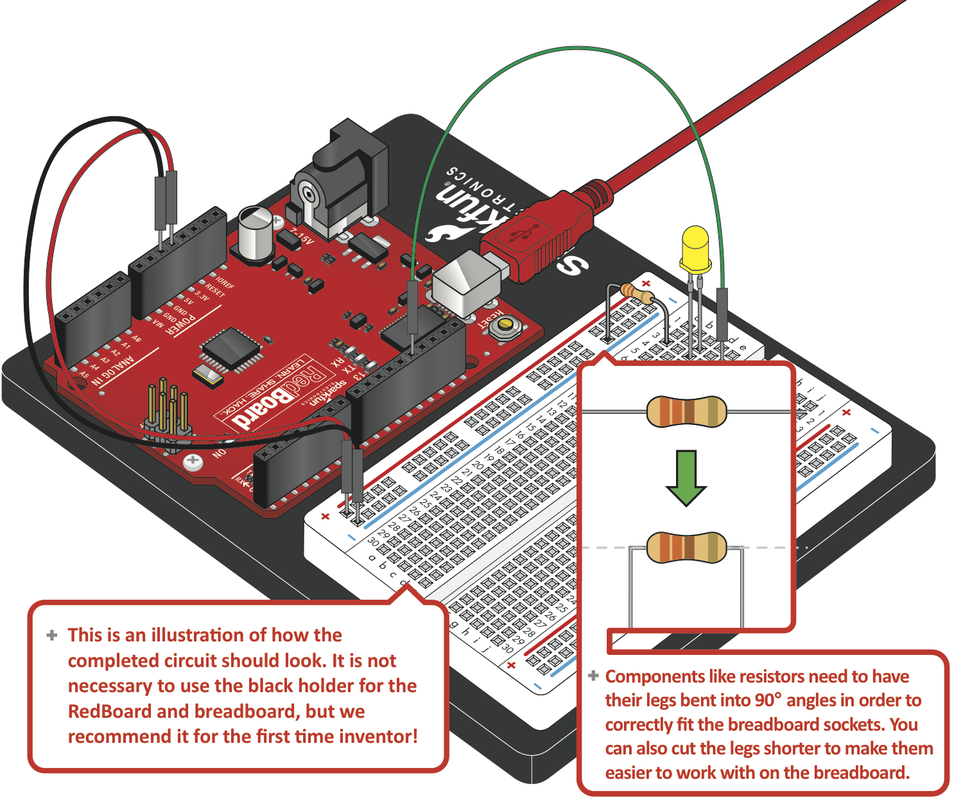
Now, we'll build circuit #1 - Blinking an LED.
Now, we'll build circuit #1 - Blinking an LED.
Learning Target
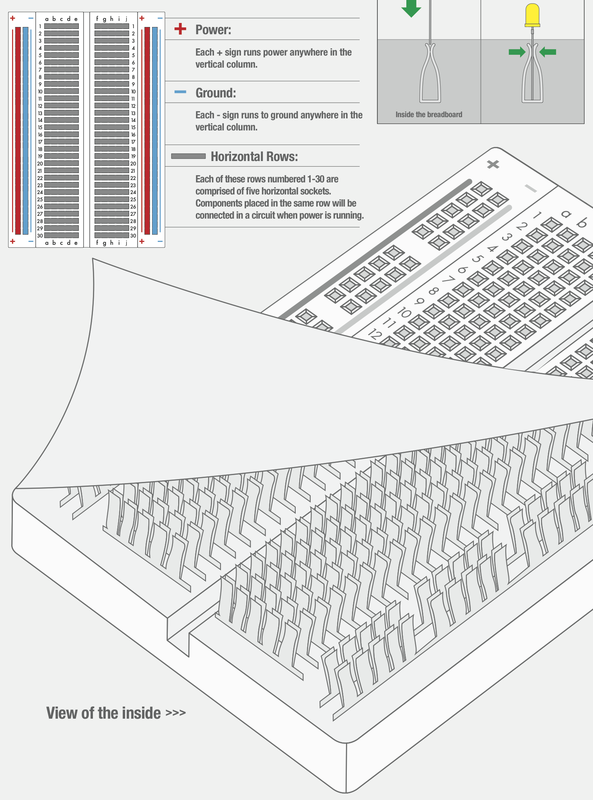
- I can explain how a breadboard is constructed and which pins are connected together.
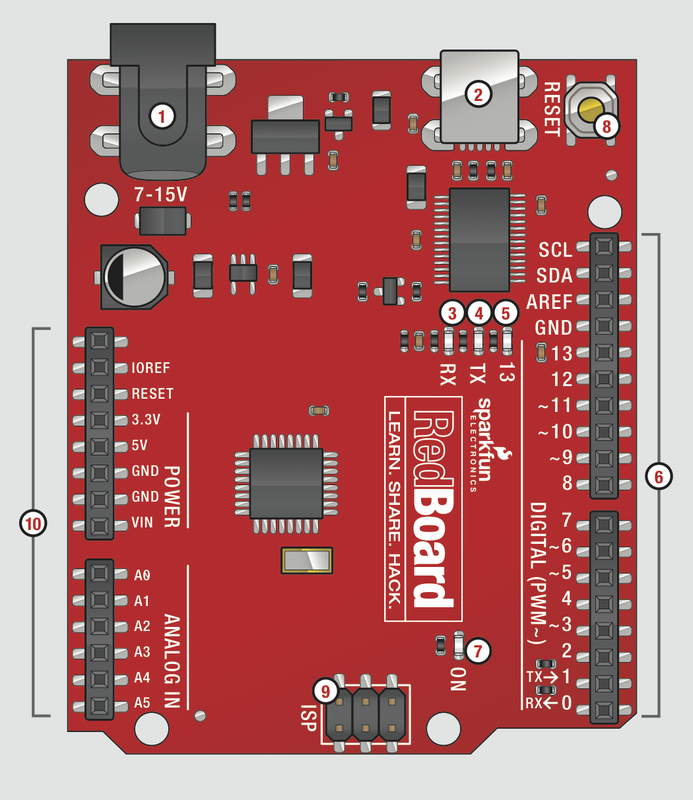
- I can identify the major parts of an Arduino microcontroller.
- I can create a simple Arduino sketch and upload it to the Arduino board.
Resources
Arduino Code
/*******************************************************************************
 * SparkFun Inventor's Kit
 * Example sketch 01 -- BLINKING A LED
 *
 * Turn an LED on for one second, off for one second, and repeat forever.
 *
 * This sketch was written by SparkFun Electronics, with lots of help from
 * the Arduino community. This code is completely free for any use.
 * Visit http://sparkfun.com/sikguide for SIK information.
 * Visit http://www.arduino.cc to learn about the Arduino.
 *
 * Version 2.0 6/2012 MDG
/******************************************************************************/

void setup()
{
  pinMode(13, OUTPUT);
}

void loop()
{
  digitalWrite(13, HIGH);   // Turn on the LED
  delay(1000);              // Wait for one second
  digitalWrite(13, LOW);    // Turn off the LED
  delay(1000);              // Wait for one second
}

/*******************************************************************************
 * Try changing the 1000 in the above delay() functions to different numbers
 * and see how it affects the timing. Smaller values will make the loop run
 * faster. (Why?)
 *
 * Other challenges:
 *    - Decrease the delay to 10 ms. Can you still see it blink?
 *    - Find the smallest delay that you can still see a blink.
 *    - What is this frequency?
 *    - Modify the code above to resemble a heartbeat.
/******************************************************************************/
